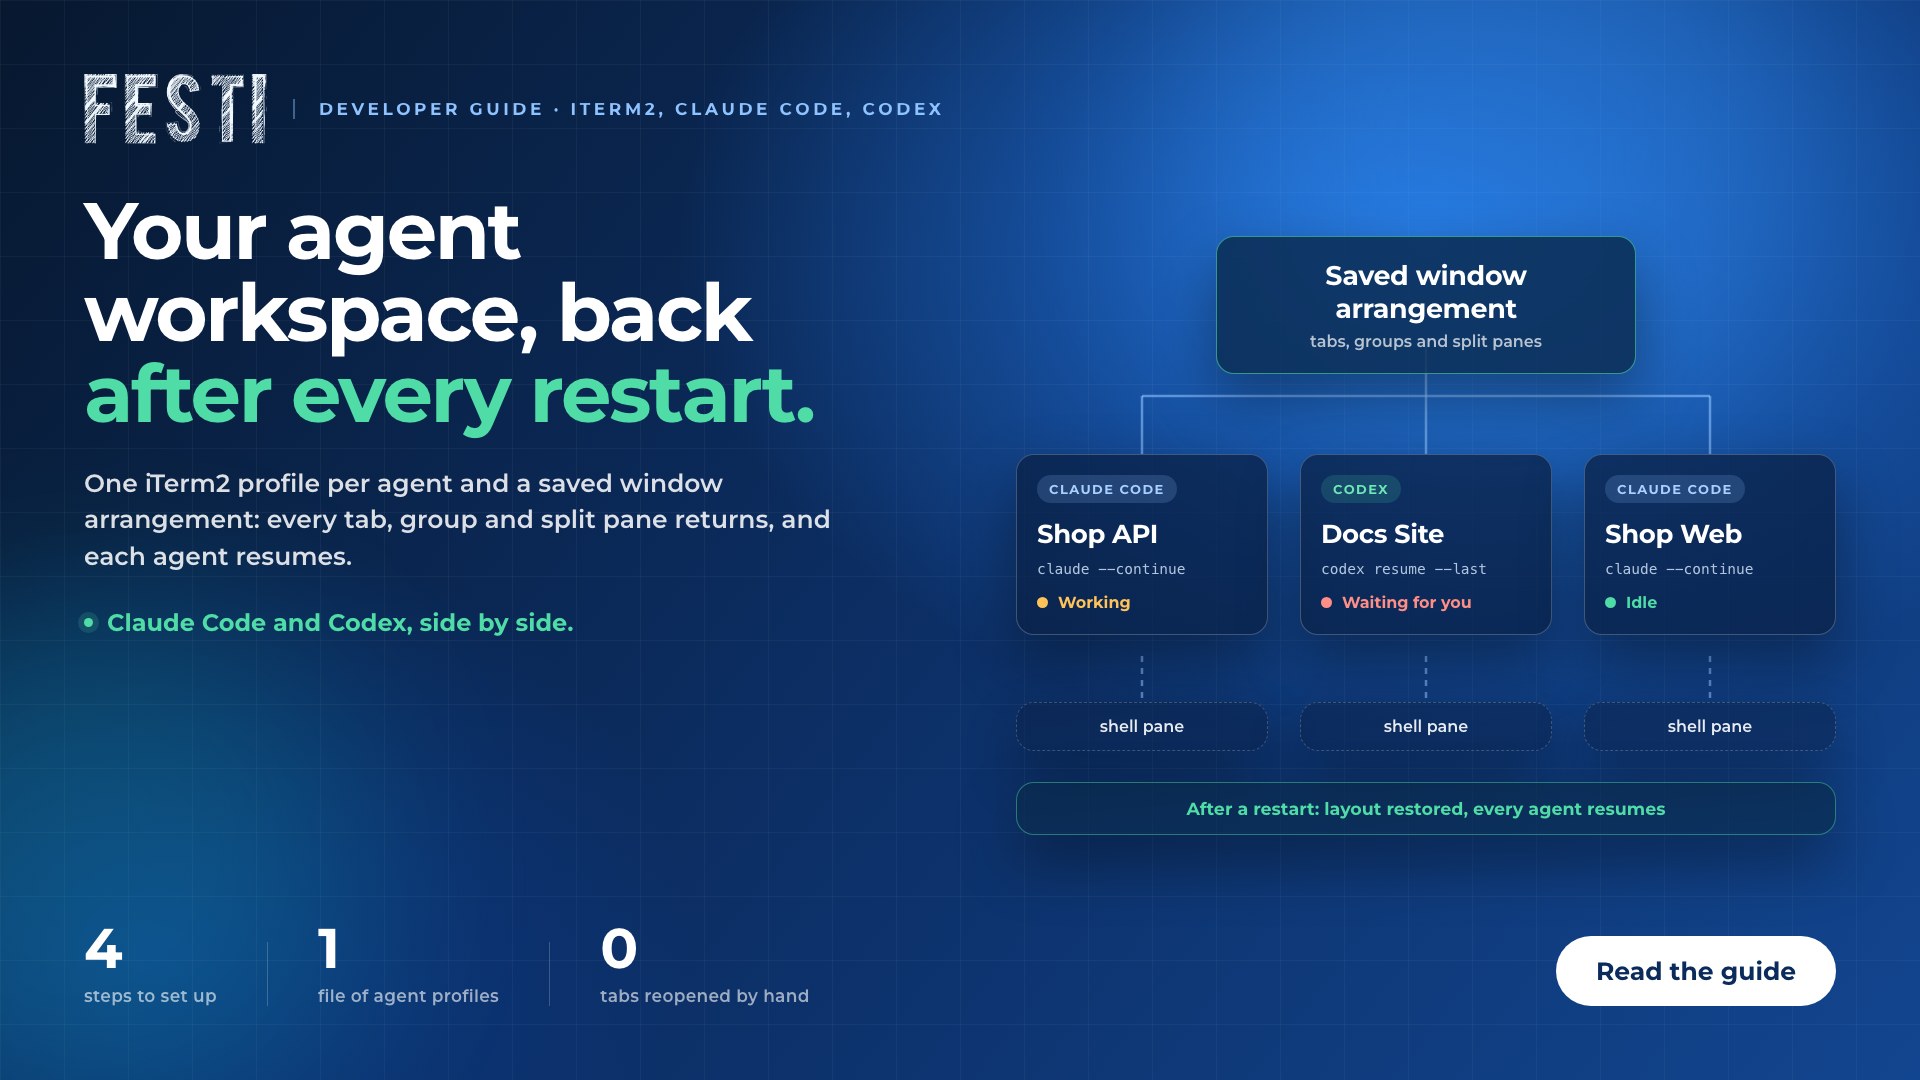
What you get
- One tab per agent, named after its project and grouped by product.
- A status on every tab: working, waiting for you, or idle.
- A plain terminal pane next to each agent, opened in the same folder.
- The whole layout back after every restart, with each agent resuming where it stopped.
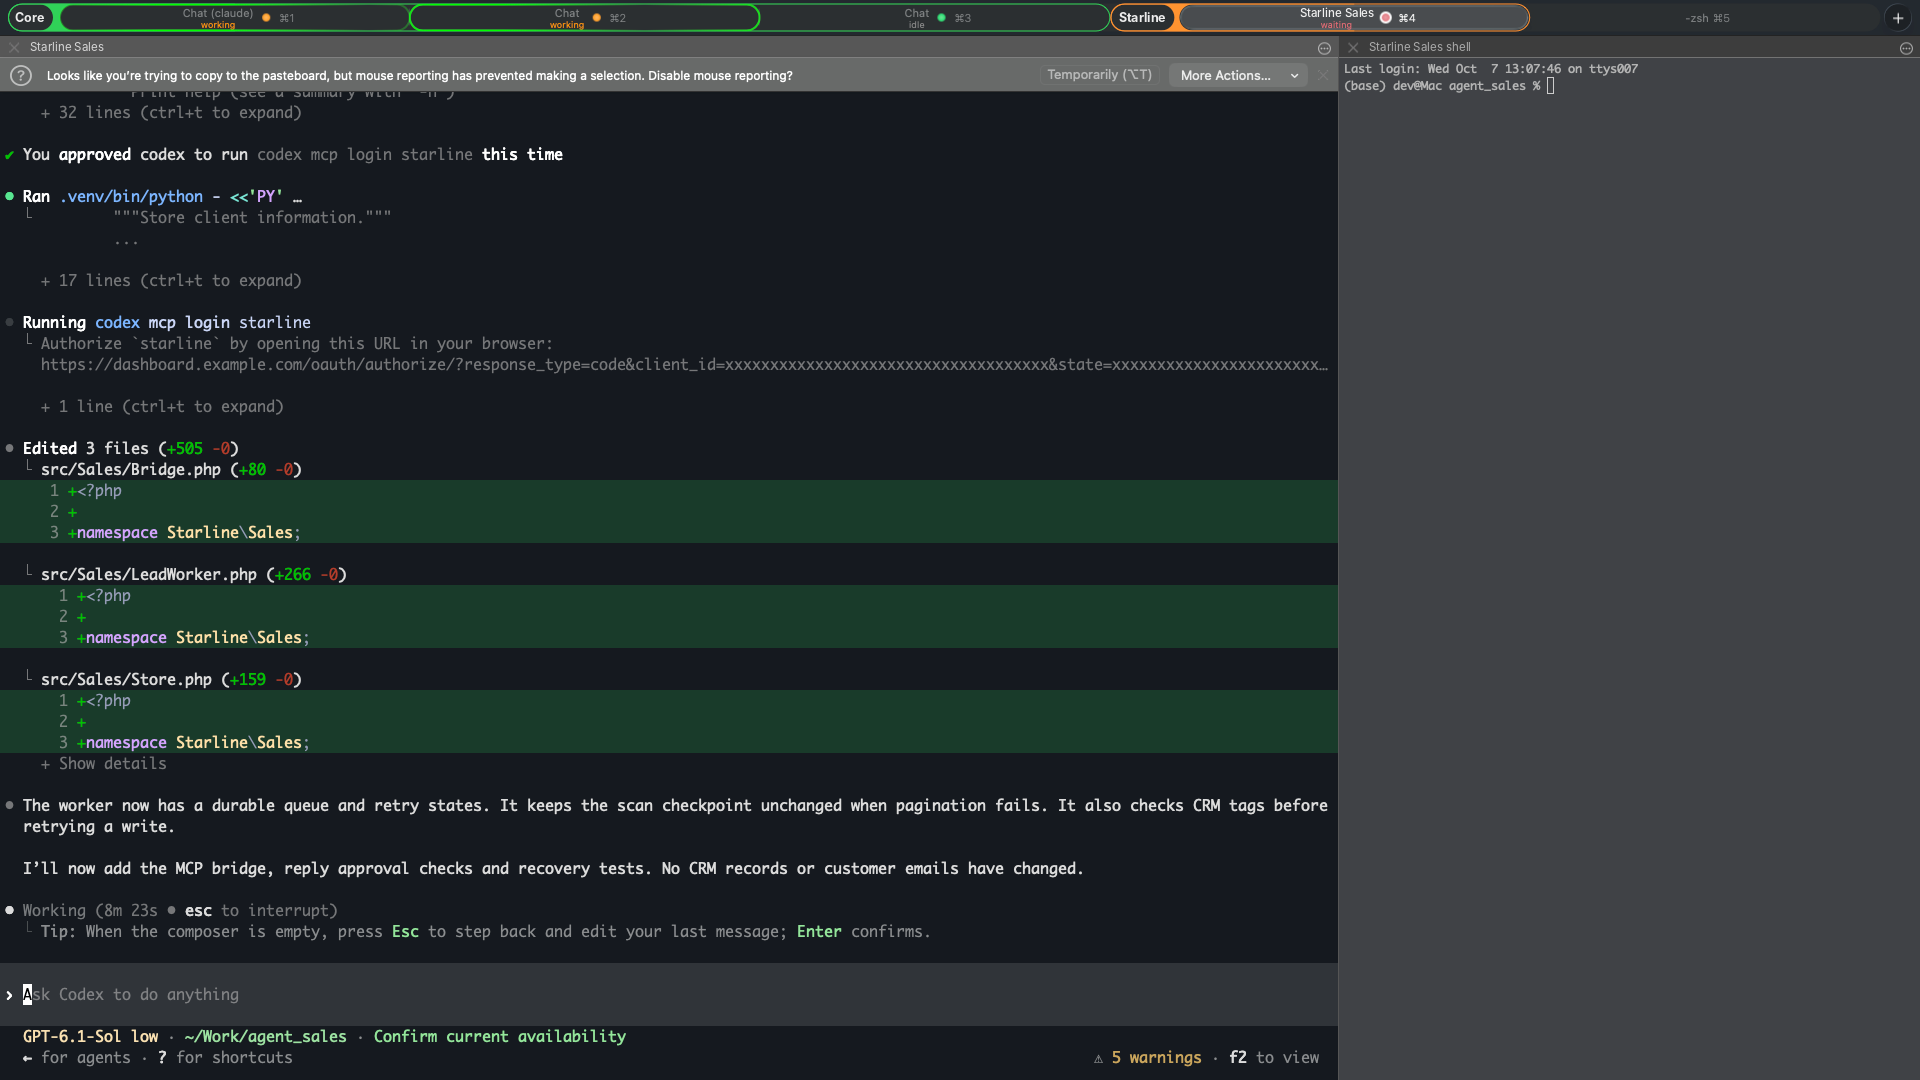
My workspace in iTerm2: two tab groups, a status under each tab, and an agent pane beside a plain shell. Project names, paths, the host name and a login URL are replaced with placeholders.
Step 1: See every agent's status
Choose iTerm2 > Install Claude Code Integration. It lists what it will change before you confirm. The main change is a set of hooks in ~/.claude/settings.json that report each Claude session's state to iTerm2.
Then turn on the views you want:
- Session Status tool. View > Toggle Toolbelt, then View > Toolbelt > Session Status. It lists every session in the window, and sessions waiting for you sort to the top.
- Cockpit. Window > Cockpit (⌥⇧⌘C) is a floating panel with the same list across all windows.
- Notify on Status Change. Window > Notify on Status Change (⇧⌘X) alerts you the next time a session in the window changes state. It is a one-shot alarm: it fires once, switches itself off, and is not saved with the profile or the arrangement.
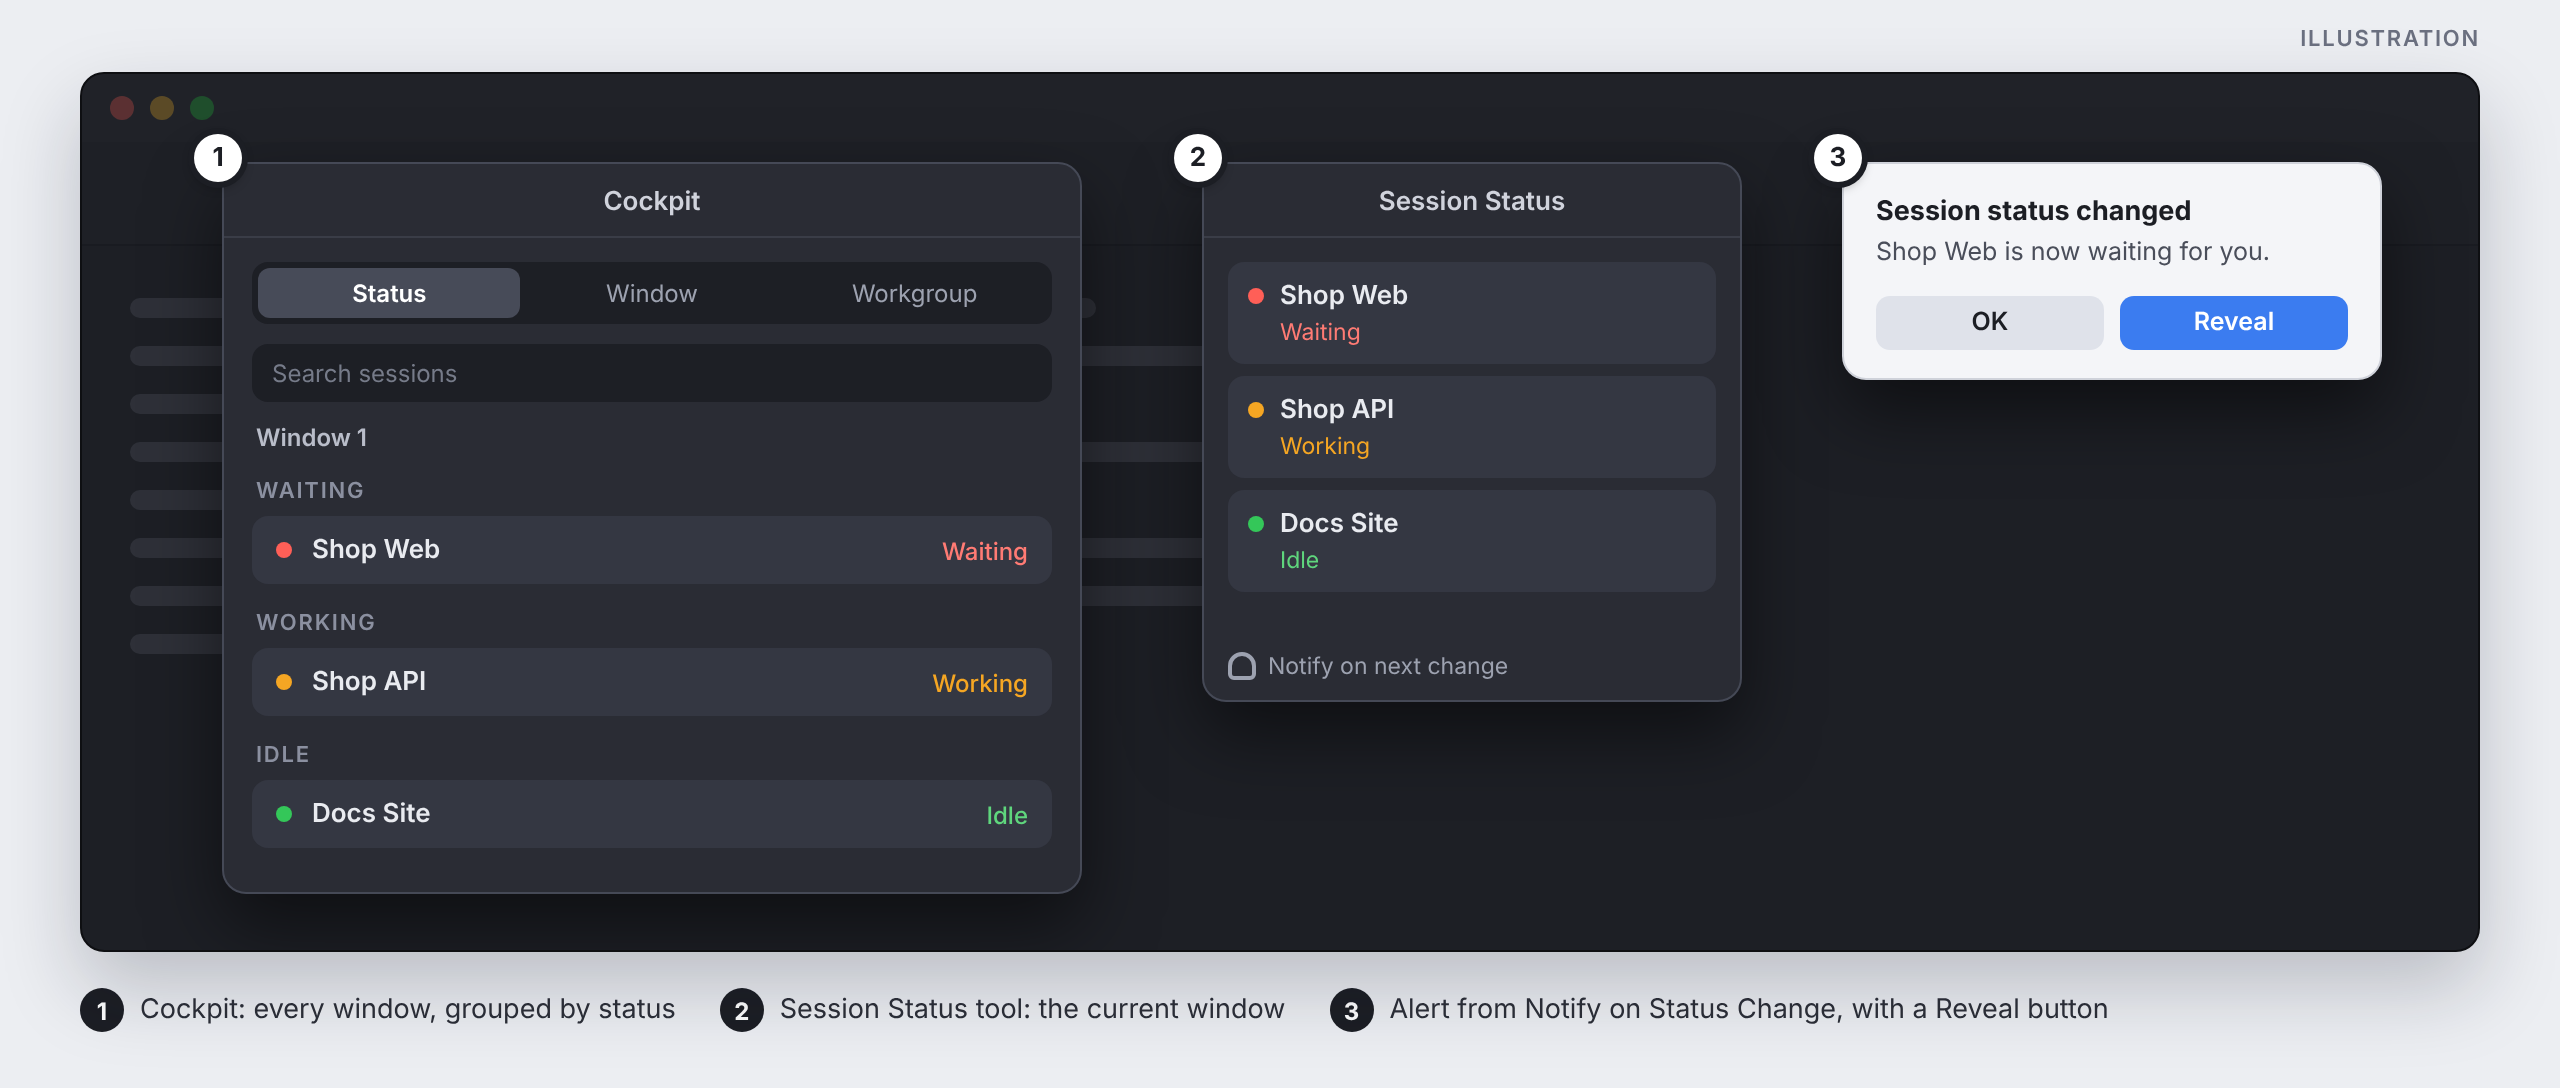
Illustration of the three status views. The real panels differ in detail.
The built-in integration covers Claude Code only. Session status is open to other tools: any program can report a status through a control sequence or the it2 command. A community plugin, iterm2-status, does this for Codex and is in public beta.
Codex status with the iterm2-status plugin
The plugin adds Codex sessions to the same Session Status list, with working, waiting and idle states. It needs iTerm2 3.7 or later, Codex CLI 0.153.4 or later, Python 3.9 or later, and the Python API switched on under iTerm2 > Settings > General > Magic.
mkdir -p ~/plugins
git clone https://github.com/treyreynolds/iterm2-status.git ~/plugins/iterm2-status
cd ~/plugins/iterm2-status
python3 install.py --dry-run
python3 install.py
python3 install.py doctor --live
- Run the dry run first. It previews what the installer will change: a personal Codex plugin entry, the status hooks, and a launcher profile for iTerm2.
- After installing, start a new Codex session, type
/hooks, and review and trust the plugin's hooks. Sessions that were already running do not report status. - Run a short task. The Codex row should move from idle to working and back.
According to its README, the hooks only report status: they never approve or block agent actions, and nothing is sent off the machine. python3 install.py uninstall removes it. It is an independent project in its first public beta, so read the hooks before you trust them.
Step 2: One profile per agent
A profile holds the three things a tab needs: its name, its folder, and the command that resumes the agent. Dynamic profiles keep all of them in one JSON file, which iTerm2 reloads whenever it changes.
Create ~/Library/Application Support/iTerm2/DynamicProfiles/agents.json. This example has a Claude Code agent, a Codex agent and a plain shell:
{
  "Profiles": [
    {
      "Name": "Shop API",
      "Guid": "agent-shop-api",
      "Tags": ["Shop"],
      "Custom Directory": "Yes",
      "Working Directory": "/Users/you/work/shop-api",
      "Initial Text": "claude --continue",
      "Allow Title Setting": false,
      "Title Components": 1,
      "Use Custom Tab Title": true,
      "Custom Tab Title": "Shop API",
      "Badge Text": "Shop API"
    },
    {
      "Name": "Docs Site",
      "Guid": "agent-docs-site",
      "Tags": ["Docs"],
      "Custom Directory": "Yes",
      "Working Directory": "/Users/you/work/docs-site",
      "Initial Text": "codex resume --last",
      "Allow Title Setting": false,
      "Title Components": 1,
      "Use Custom Tab Title": true,
      "Custom Tab Title": "Docs Site",
      "Badge Text": "Docs Site"
    },
    {
      "Name": "Shop API shell",
      "Guid": "shell-shop-api",
      "Tags": ["Shop"],
      "Custom Directory": "Yes",
      "Working Directory": "/Users/you/work/shop-api",
      "Allow Title Setting": false,
      "Title Components": 1,
      "Badge Text": "Shop API shell"
    }
  ]
}
| Key | What it does |
|---|
Guid | Any unique text. iTerm2 uses it to track the profile. |
Custom Directory and Working Directory | Open the tab in that folder. |
Initial Text | Typed into the tab, followed by Enter, when the session starts. |
Allow Title Setting | Set to false, it stops programs from renaming the tab. |
Title Components | 1 shows the session name only. |
Use Custom Tab Title and Custom Tab Title | Set the tab's title when the profile opens in a new tab. |
The shell profile has no command. It is for the plain terminal pane beside an agent.
I also give every profile a badge (Badge Text) and keep the session name equal to the profile name. With many tabs and constant context switching, those hints matter. The badge is drawn in large type in the corner of the pane and stays visible when the pane is not focused, so I am far less likely to type a task into the wrong Claude session, which is an annoying mistake to make.
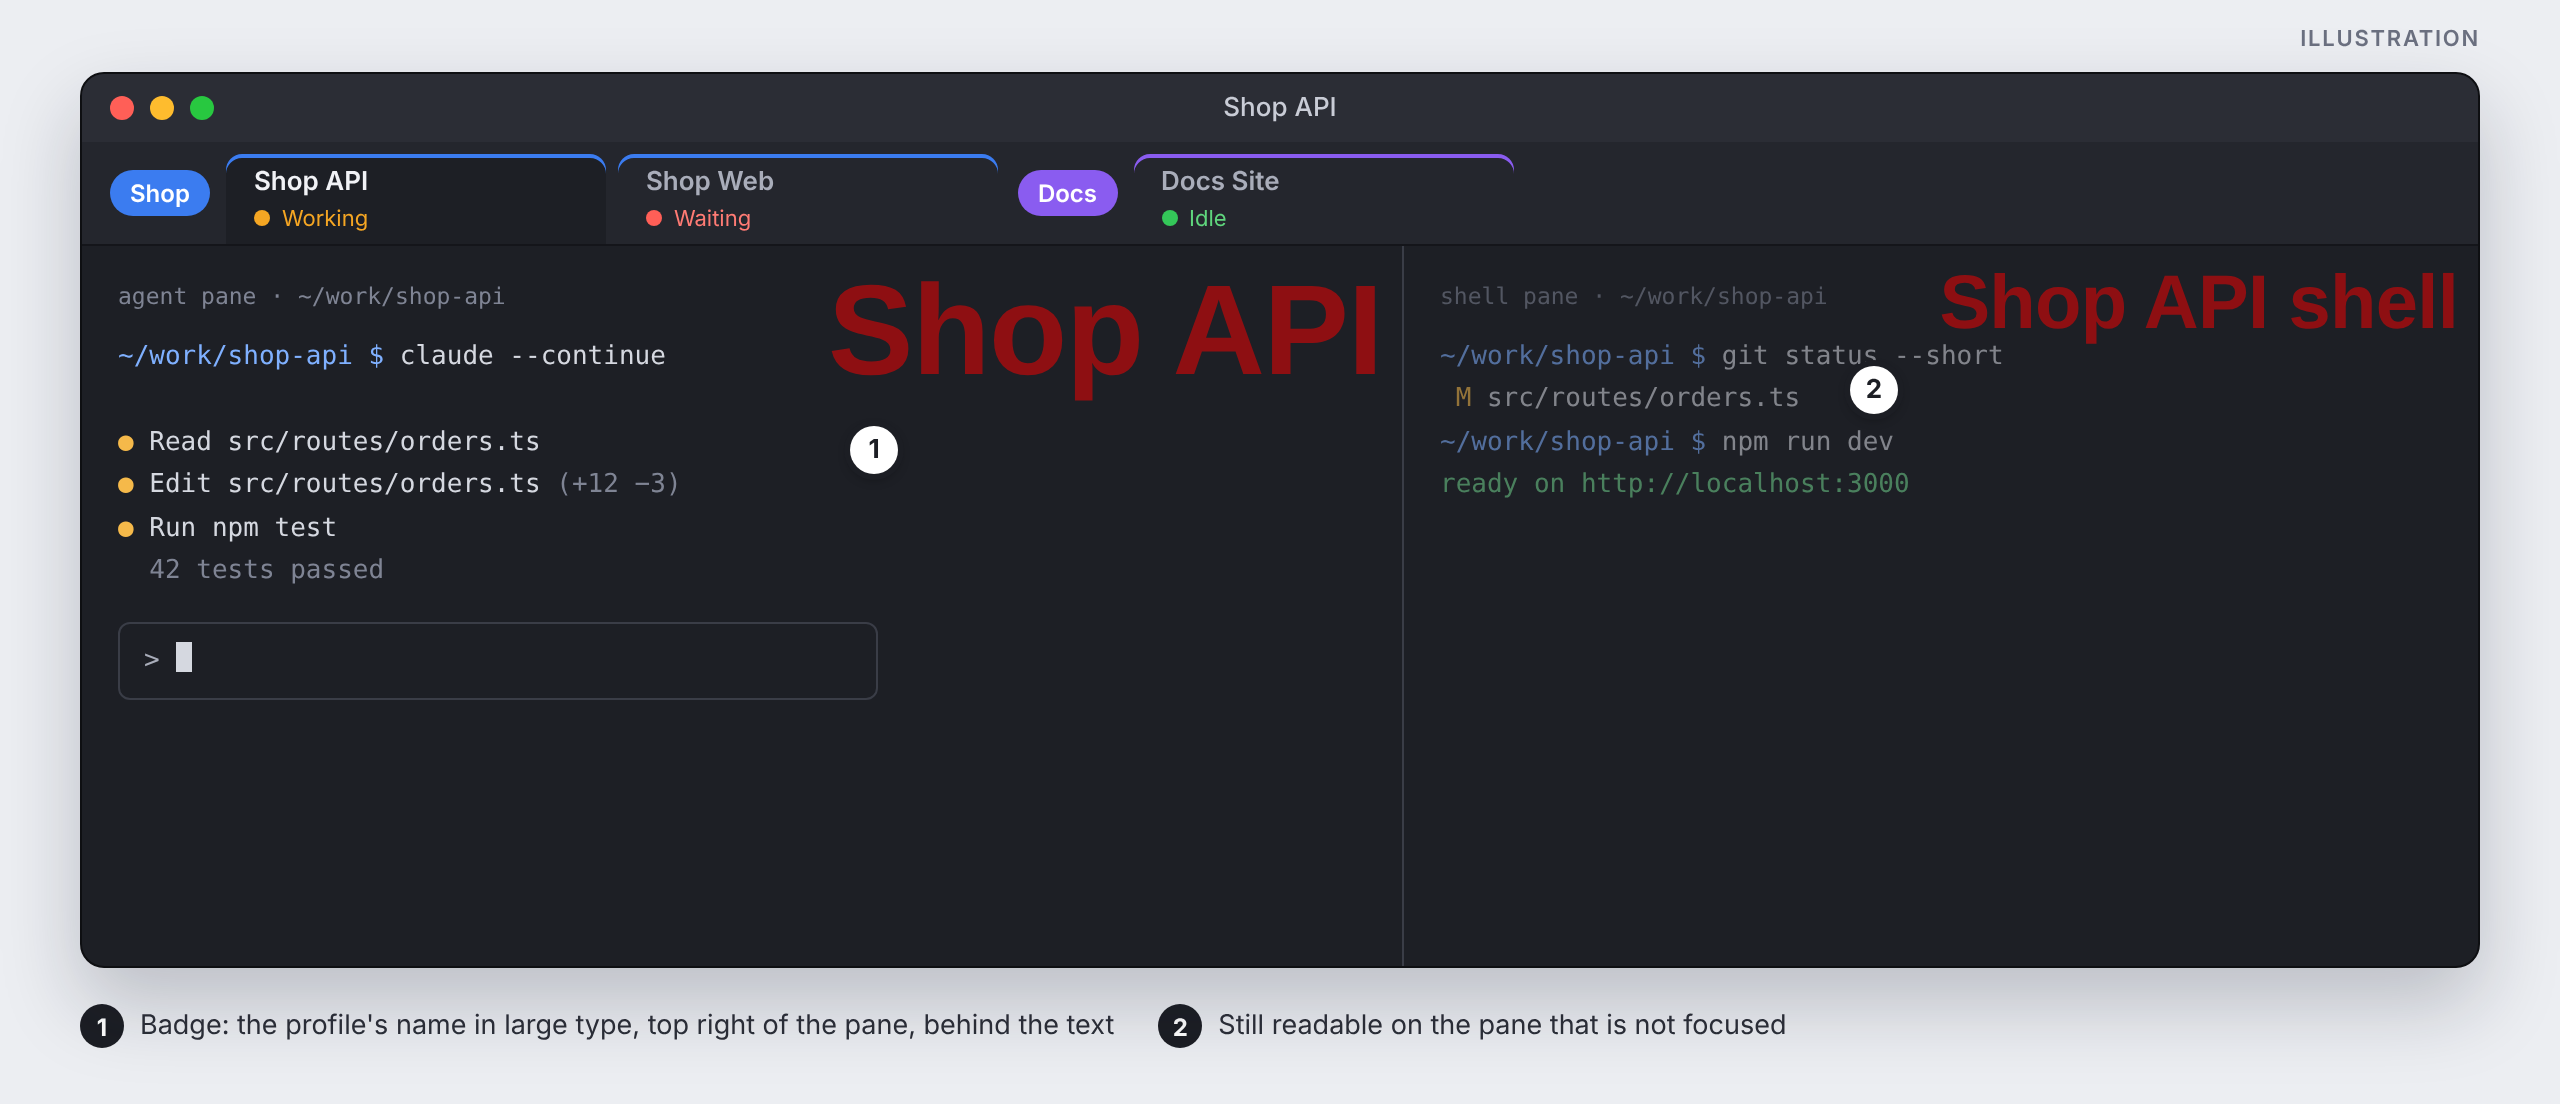
Illustration of badges in iTerm2's default style: bold red type in the top-right corner of each pane. Not a screenshot.
The session name comes from the profile's Name. On Claude tabs iTerm2 renames it to "Chat" unless you clear the Name of the main session in the Claude Code workgroup, under Settings > Arrangements > Workgroups.
Every file in that folder must be valid, or iTerm2 loads none of them. Write the file with a code editor, because a rich-text editor can replace straight quotes with curly ones.
Step 3: Build the layout
- Open each agent from the Profiles menu. Each tab opens in its folder, takes its name and resumes the agent.
- Right-click a tab and choose Add Tab to Group. Name the group, then drag the related tabs into it.
- For a terminal next to an agent, choose Shell > Split Vertically… (the item with the dots) and pick the matching shell profile.
The plain split shortcut (⌘D) copies the tab's profile, command included, so it would start a second agent in the new pane.
Step 4: Save it and open it at startup
- Choose Window > Save Window Arrangement and give it a name.
- In Settings > Arrangements, select it and click Set Default.
- In Settings > General > Startup, choose Open Default Window Arrangement.
The arrangement stores windows, tabs, tab titles, tab groups and split panes. On restore, each tab reads its profile again, so later edits to agents.json apply without saving the arrangement again. A change to the layout itself, such as a new tab, split or tab name, needs a new save under the same name.
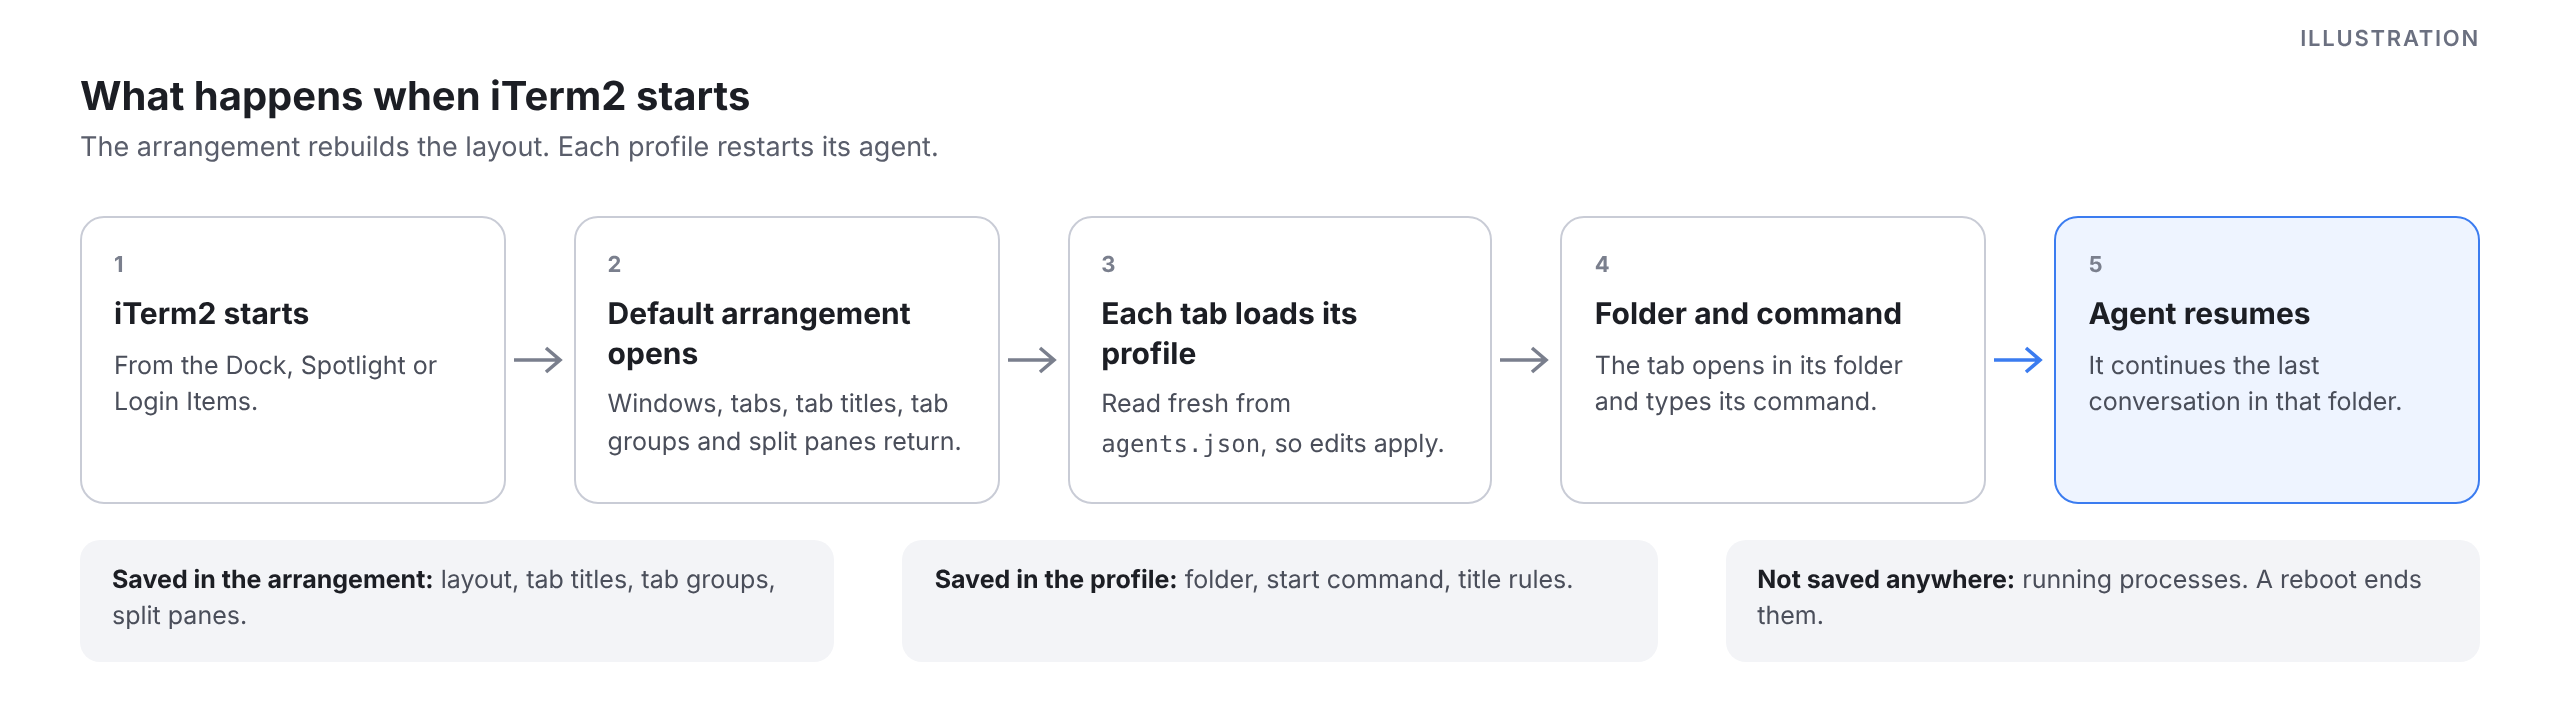
A reboot still ends every running process, and no terminal can prevent that. What comes back is the layout, and each profile's command restarts its agent in its last conversation.
Optional: a first prompt, Remote Control and notifications
A first prompt. Both CLIs take a prompt on the command line, so Initial Text can hand the agent its first instruction, for example codex resume --last 'Summarize where we stopped and wait.' Claude Code documents the same form after --resume; check that --continue accepts it on your version. A prompt that asks for a summary and waits is safer than "continue", which starts every agent working the moment iTerm2 opens.
Remote Control. In Claude Code, run /config and set Enable Remote Control for all sessions, or put "remoteControlAtStartup": true in ~/.claude/settings.json. Each session can then be continued from claude.ai/code or the Claude mobile app. A conversation resumed with --continue reconnects to the Remote Control session it had before.
Permanent notifications. Notify on Status Change cannot be switched on from a profile, but desktop notifications can. Claude Code sends one when it finishes a task or pauses for a permission prompt while you appear to be away. iTerm2 forwards it to macOS when the agent's profile has these two keys:
"BM Growl": true,
"Send Terminal Generated Alerts": true
BM Growl is the internal name of the Notification Center Alerts checkbox in Settings > Profiles > Terminal. The second key is Send escape sequence-generated alerts under Filter Alerts. iTerm2 also needs notification permission in macOS System Settings.
Gotchas
These cost me the most time. Each one has a short fix.
| Symptom | Cause | Fix |
|---|
| Sessions do not come back after a restart | The default startup option relies on macOS saving window state, which did not happen reliably for me | Open a default window arrangement at startup instead |
| A tab shows "Chat (claude)" instead of its name | When claude starts, the Claude Code workgroup renames the session to "Chat" | Set the tab title: Window > Edit Tab Title, or Custom Tab Title in the profile. It sits on top of the session name |
| A name set in Edit Session > Session Name is lost | Session Name is the field the workgroup overwrites | Use the tab title, or clear the main session's Name in the Claude Code workgroup |
| A split pane starts a second agent | ⌘D copies the tab's profile, command included | Split with Shell > Split Vertically… and a shell profile |
| iTerm2 opens one plain window | Starting iTerm2 by opening a folder or file with it skips the startup arrangement | Start it from the Dock or Spotlight |
| New profiles do not appear | One invalid file in DynamicProfiles stops all of them from loading | Check the file: plutil -p agents.json prints it only if it parses |
Conclusion
A restart used to cost me the whole workspace. Now iTerm2 opens, the tabs come back with their names and groups, and every agent picks up its last conversation. I no longer feel sad when my Mac needs a restart.
For this way of working I keep a few short rules:
- One agent, one profile, one folder. Two agents in one folder resume the same conversation.
- Label every tab three ways. Tab title, session name and badge: the hints stop you typing a task into the wrong session.
- Split with a shell profile. Never with ⌘D, which starts a second agent.
- Save the arrangement after every layout change. iTerm2 opens the last saved version, not the last one you saw.
- Keep every profile in one file.
agents.json is the only place that says what runs where. - Write start prompts you would run unattended. They fire every time iTerm2 opens.
- Let the status and notifications call you. Do not walk the tabs to see who is waiting.
Here is the shape of the agents.json I ended with, with every attribute I use. The names and paths are examples: one Claude Code agent, one Codex agent and one shell.
{
  "Profiles": [
    {
      "Name": "Shop API",
      "Guid": "agent-shop-api",
      "Tags": ["Shop"],
      "Custom Directory": "Yes",
      "Working Directory": "/Users/you/work/shop-api",
      "Initial Text": "claude --continue 'Continue where you left off.'",
      "Allow Title Setting": false,
      "Title Components": 1,
      "Use Custom Tab Title": true,
      "Custom Tab Title": "Shop API",
      "Badge Text": "Shop API",
      "BM Growl": true,
      "Send Terminal Generated Alerts": true
    },
    {
      "Name": "Docs Site",
      "Guid": "agent-docs-site",
      "Tags": ["Docs"],
      "Custom Directory": "Yes",
      "Working Directory": "/Users/you/work/docs-site",
      "Initial Text": "codex resume --last 'Continue where you left off.'",
      "Allow Title Setting": false,
      "Title Components": 1,
      "Use Custom Tab Title": true,
      "Custom Tab Title": "Docs Site",
      "Badge Text": "Docs Site",
      "BM Growl": true,
      "Send Terminal Generated Alerts": true
    },
    {
      "Name": "Shop API shell",
      "Guid": "shell-shop-api",
      "Tags": ["Shop"],
      "Custom Directory": "Yes",
      "Working Directory": "/Users/you/work/shop-api",
      "Allow Title Setting": false,
      "Title Components": 1,
      "Badge Text": "Shop API shell"
    }
  ]
}
| Attribute | Why I set it |
|---|
Name, Guid, Tags | The profile's name, a unique id, and a tag for grouping and searching profiles. |
Custom Directory, Working Directory | The tab opens in the agent's folder. |
Initial Text | The resume command and its first prompt, typed when the tab opens. |
Allow Title Setting, Title Components | Programs cannot rename the tab, and the title shows the session name only. |
Use Custom Tab Title, Custom Tab Title | The tab gets its name when the profile opens. |
Badge Text | The large label in the corner of the pane. |
BM Growl, Send Terminal Generated Alerts | Desktop notifications when the agent needs me. |